Employee Onboarding
Employee Onboarding Overview
This manual relates to version 1.4.1 of the Employee Portal
Inzenius, in partnership with Flare, have integrated a digital onboarding system for new hires within the Employee Portal. This alleviates some of the manual admin and paperwork process of setting up a new Employee File. The Inzenius/Flare Onboarding feature allow Employees to digitally add their Personal, Bank, Tax and Super details to Inzenius (and Flare) which will then be verified by the Employer.
This User Manual outlines how to navigate the Employee Onboarding feature and successfully complete the Onboarding process.
The Inzenius Employee Onboarding feature can be accessed through your PC, tablet and/or phone through Google Chrome, Microsoft Edge, and/or Mozilla Firefox.
Note: While the Employee Portal may be accessed through different browsers, the aforementioned are the recommended web browsers to ensure full functionality within the Portal.
Sign Up
Step 1: To begin, open the link provided by your Employer on your preferred Internet Browser and click on “Sign up” to Continue.
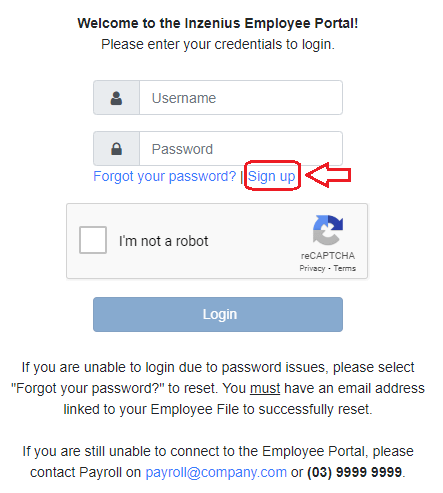
Employee Onboarding – Employee Portal Screen
Step 2: You will then be directed to the ‘Sign Up’ page where you will be required to submit your First Name, Last Name and Email Address. Once submitted, an Employee request will be forwarded to the Employer for approval. When your request is approved, a link will be sent to the Email Address you provided.
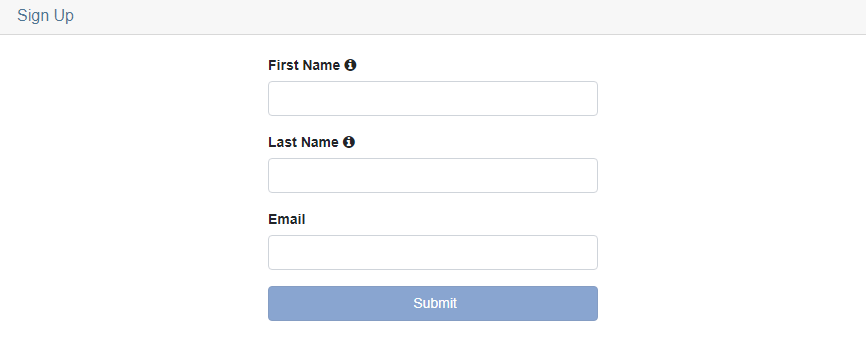
Employee Onboarding – Sign Up Screen
Step 3: When you receive a welcome email for onboarding, click on the link provided in the email to be directed to the portal to set up your password. The link will expire after 24 hours, after this time you will need to request a new link from your Employer.
Your password must contain the following:
• at least 12 characters
• one lowercase letter
• one uppercase letter
• one number
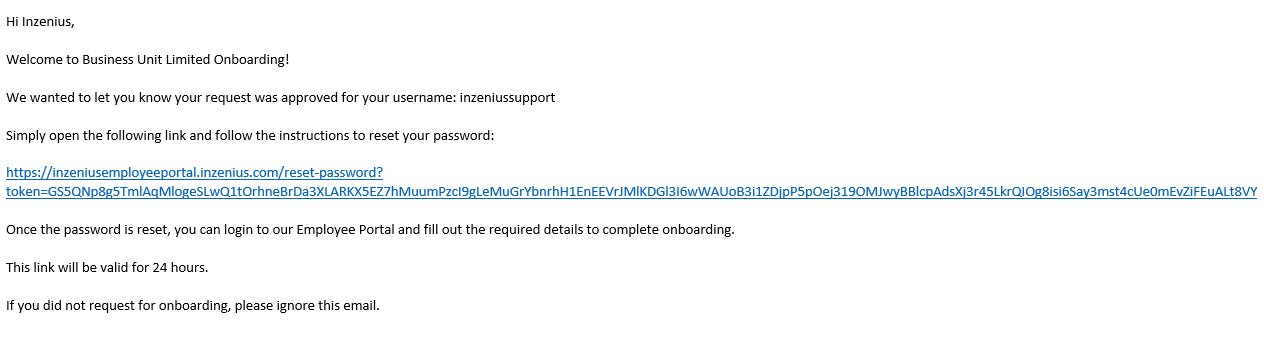
Employee Onboarding – Setting Password Email
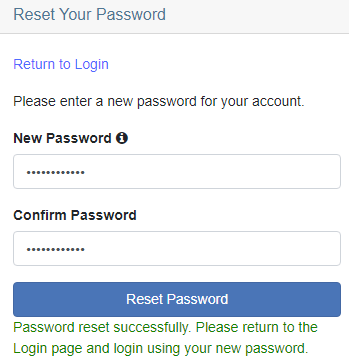
Employee Onboarding – Password Setup
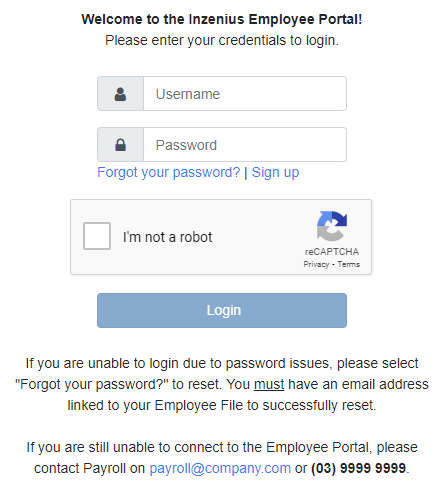
Step 4: Logging In
Once you have setup/reset your password, select the ‘Return to Login’ option to direct you to the Employee Portal Login page. Enter your Username (provided in the welcome email) and Password in the appropriate fields, and follow the prompts to verify your identity.
Employee Onboarding – Employee Portal Log In
Click the reCAPTCHA checkbox and follow the prompts to complete verification. Once confirmed, you will then be able to login into the Employee Portal.

Employee Portal – reCAPTCHA successful
Employee Onboarding
Below is a brief overview of the pages and the menus available in the Employee Onboarding.
Personal Details: Add Personal Details in this section. Which includes basic information such as First Name, Last Name, Address, Date of Birth etc.
Emergency Contacts: Add Emergency Contact details
Bank Details: Add Bank Account details
Tax Details: Add Tax Declaration
Super Selection: Add your Super Fund details or create a new Super Fund.
Personal Details
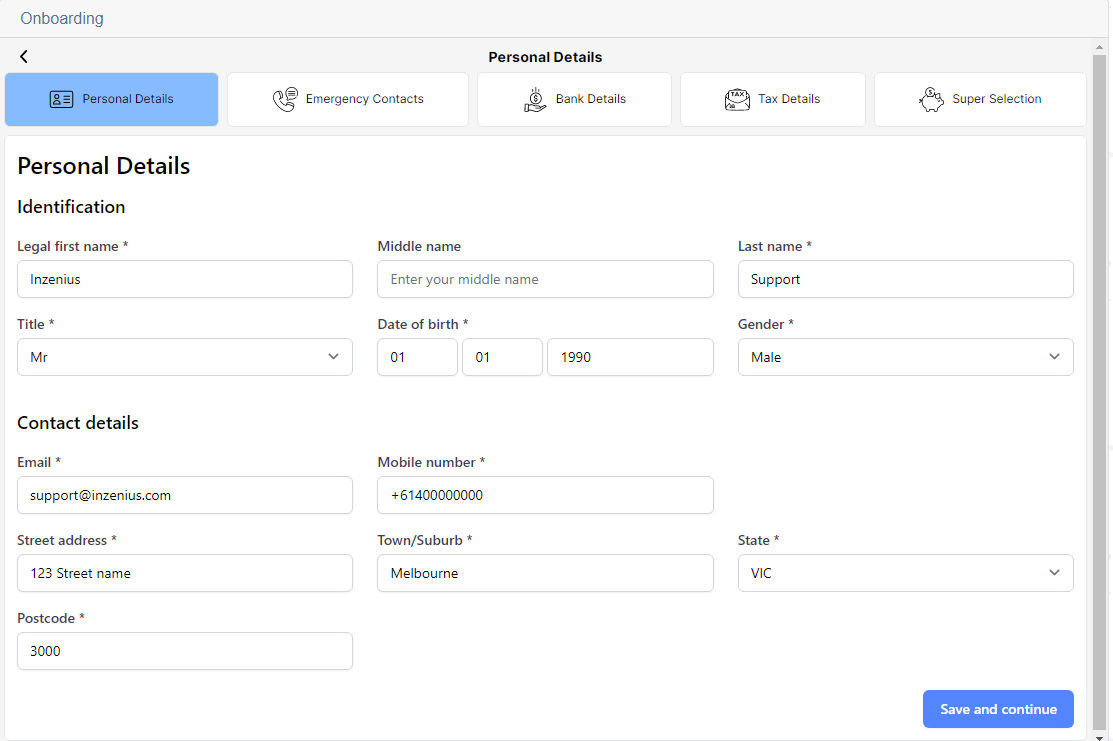
In the Personal Details Tab, you will be required to complete your Identification and Contact details. You will have to provide all the mandatory information before you can proceed to the next Tab.
Employee Onboarding – Personal Details
Once all the information has been completed, click the “Save and continue” button to proceed to the next Tab. Once the details have been saved, you can leave the website and can continue from where you have left off at a later stage, after logging back in again.
![]()
Employee Onboarding – “Save and continue” button
Note: Employees will not be able to proceed forward if provided information is not correct; for example, contact number can only have 9 digits. The Employee Portal will prompt for such errors.
Emergency Contacts
In the Emergency Contacts Tab, you will be required to provide the Name, Relationship and Contact details of your nominated Emergency Contact.
Once all the information has been completed, click the “Save and continue” button to proceed to the next Tab. Once the details have been saved, you can leave the website and can continue from where you have left off at a later stage, after logging back in again.

Employee Onboarding – Emergency Contact Details
Bank Details
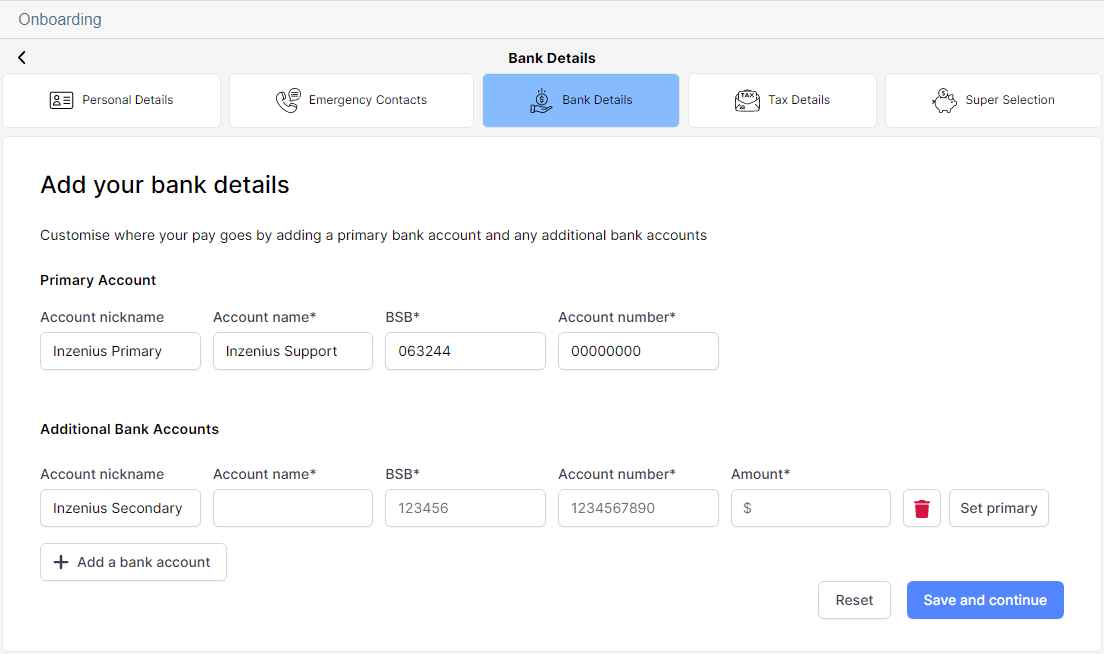
In the Bank Details Tab, you will be required to add your bank account details. This includes Account Name, BSB and Account Number. The BSB number will be verified, and the Employee Portal will prompt you if a wrong BSB number is entered.
You can add an Additional Bank Account by clicking on the “Add a bank account” button. The fixed amount of wages to be paid into the Secondary/Additional account must be entered. You can set a preferred “nickname” for each Bank Account for your reference.
Once all the information has been completed, click the “Save and continue” button to proceed to the next Tab. Once the details have been saved, you can leave the website and can continue from where you have left off at a later stage, after logging back in again.
Employee Onboarding – Bank Details
![]()
Employee Onboarding – “Add a bank account” button
Tax Details
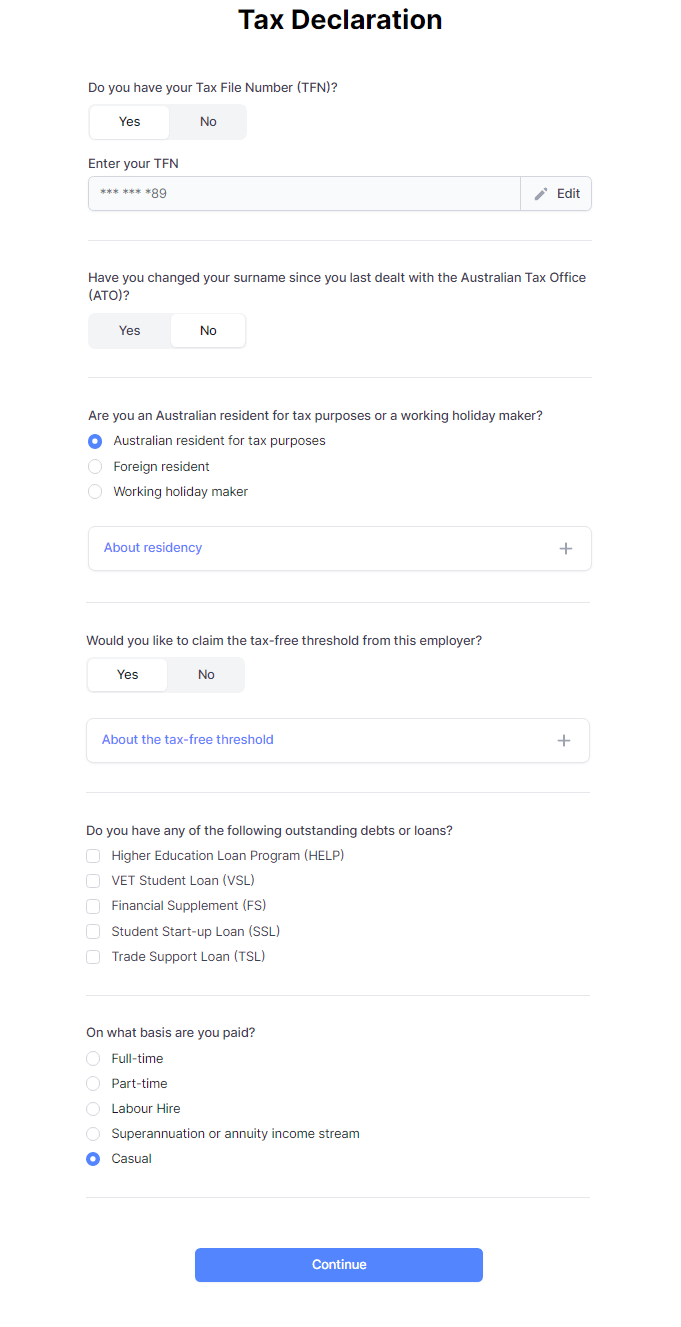
In the Tax Details Tab, you will have to fill out the Tax Declaration. A guide for answering the questions is provided on the form. The Employee Portal will verify the TFN number to ensure it is correct.
Once all the information has been completed, click the “Save and continue” button to proceed to the next Tab. Once the details have been saved, you can leave the website and can continue from where you have left off at a later stage, after logging back in again.
Employee Onboarding – Tax Declaration
Super Selection
In the Super Selection Tab, you will have to nominate a Super Fund to receive Employer contributions. An Important information page will appear, where you are required to confirm your acknowledgement of the listed conditions by clicking on the “Continue” button.
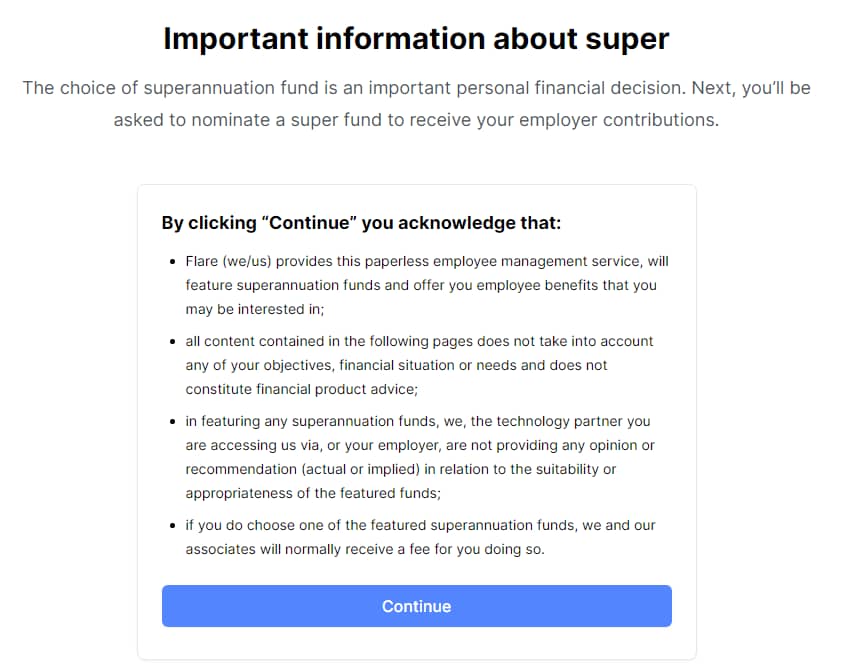
Employee Onboarding – Super Acknowledgement
On the next page Flare’s “Featured Super Funds” will appear. If you wish to sign up with any of these funds, then click on “Choose this Fund”. It will then direct you to a page where you will have to confirm your details and agree to create a new Super Fund. The New Fund’s details will be submitted to the Employer.
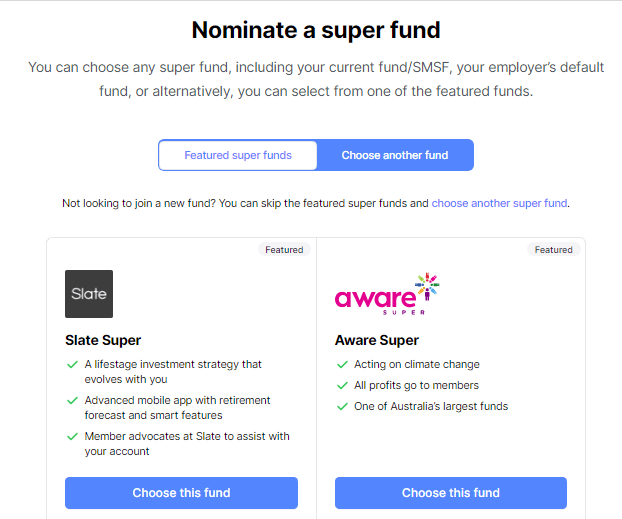
Employee Onboarding – Featured Super Funds
If you want to nominate your existing Super Fund, a Self Managed Fund, or want to proceed with the creation of a new Super Fund using the Employers Default Fund, click on the
“![]() ” button.
” button.
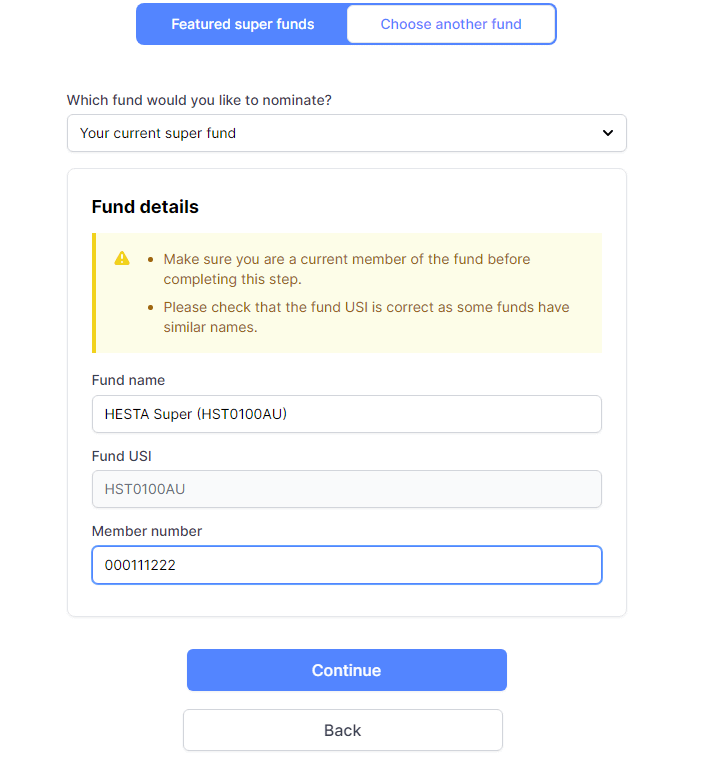
Employee Onboarding – Add your Super Fund
After adding the Super Fund details click on “Continue” and you will be directed to an Authorisation Page, where you will have to type your full name, and click “Confirm and continue” for Super Choice.
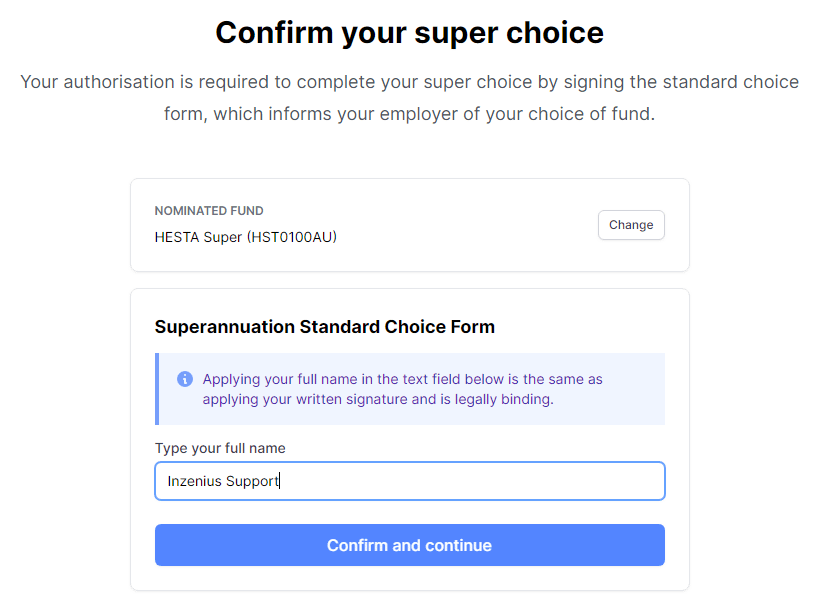
Employee Onboarding – Super Authorisation
Review
Once all Tabs are completed, you will be directed to the Review screen where you can review and edit your information by clicking the relevant Tab, or can click “Submit” to complete the Onboarding process.
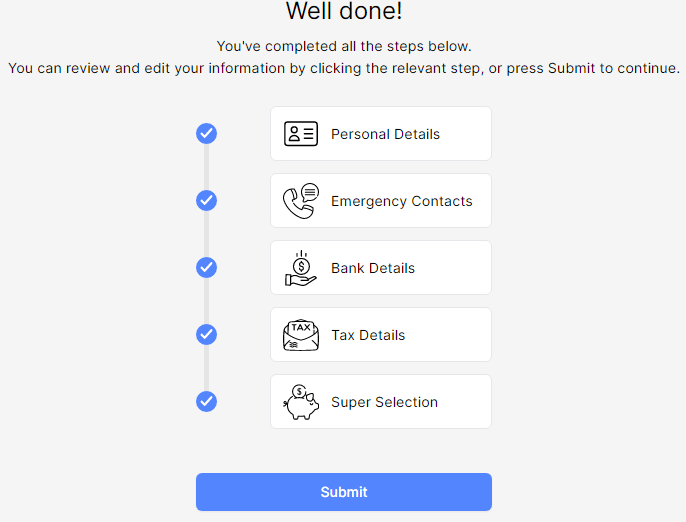
Employee Onboarding – Review Screen
Whats Next?
Now that you have successfully completed your onboarding steps, your employee profile will be created. You can login to the Employee Portal and review any details submitted. The Employee Portal will now remain your main source of employee information (refer The Employee Portal for more information).
From this point your employer will now finalise your employee details and advise you when your profile is complete. The Employee Portal will then unlock further features including, but not limited to; payslip access, employee information and leave requesting.
For further information or questions please contact your associated manager and/or payroll department.