Employee Portal Admin Dashboard
Overview
The Inzenius Employee Portal allows employees to remotely view their Personal Information, Payslips, and PAYG Payment Summaries for previous Financial Years. Employees are also provided the opportunity to view and upcoming Shifts, and (if enabled) are able to accept or reject Shifts accordingly.
This manual outlines how to navigate the Admin Dashboard and configure settings within the Inzenius Employee Portal.
The Inzenius Employee Portal can be accessed through your computer/laptop, tablet and/or phone through Google Chrome, Microsoft Edge, and/or Mozilla Firefox.
Note: While the Employee Portal may be accessed through different browsers, the aforementioned are the recommended Web Browsers to ensure full functionality within the Portal.
Logging In
To begin, open your preferred Internet Browser and type in the address provided to by your manager, Payroll or HR. Enter your Username and Password in the appropriate fields, and follow the prompts to verify your identity.
Tip: To access the Admin Dashboard, the User logged in must have relevant privileges assigned in the User Role.
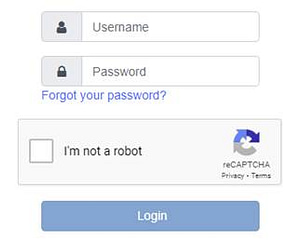
Figure #1: Employee Portal – User Credentials
Click the reCAPTCHA checkbox and follow the prompts to complete verification. Once confirmed you will then be able to login into the Employee Portal.
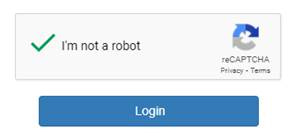
Figure #2: Employee Portal – reCAPTCHA successful
Employee Portal Admin Dashboard Overview
Below is a brief overview of the Menus and their submenus available in the Employee Portal.
| Menu | Sub Menu | Description |
|---|---|---|
| COMPANY LOGO | View and upload a company logo | |
| COMPANY BLURB | Login Page Header | View and edit blurbs displayed on the login and landing pages of the Employee Portal |
| Login Page Footer | ||
| Landing Page | ||
| CONFIGURE MANAGERS | View and edit managers listed to employees under ‘Contact’ and ‘Leave Request’ | |
| CONFIGURE SETTINGS | Change settings related to Rostering, Time & Attendance, and Leave Requests |
Table #1: Employee Portal Admin Dashboard Overview
Admin Dashboard
The Admin Dashboard is where Clients are able to customise sections of the Inzenius Employee Portal, configure the Managers who will be able to receive Leave Applications and/or emails sent via the “Contact” page, and configure additional settings.
This Dashboard will only be available to administrator and some select Users.

Figure #3: User Settings – Admin Dashboard
Note: Access to the Admin Dashboard is determined by the security access configured in the Inzenius Core Application > ‘Security’ > ”Role” module.
Company Logo
Clients are able to upload their own Company Logo to be displayed in place of the Inzenius Logo on the Employee Portal. Noting that, only one image can be saved at a time, of which must not exceed 1MB in size.
To up load an image, click on “Choose File” and select a file from your machine. Once the file has been selected click on “Save Logo”.
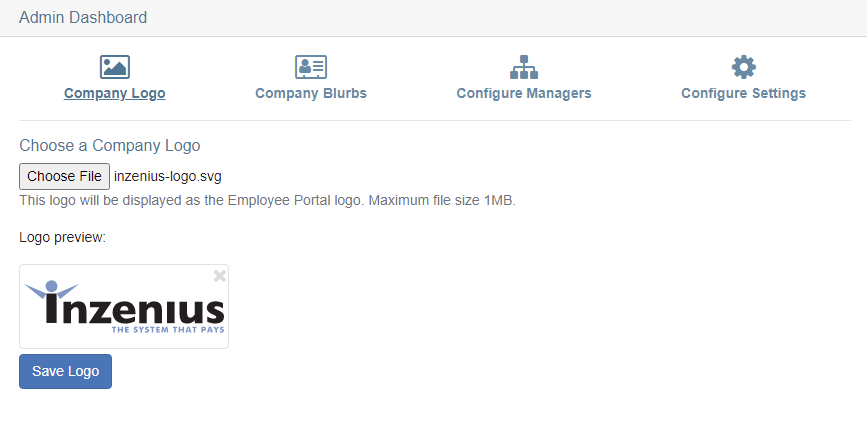
Figure #4: Company Logo – Logo Upload
Company Blurbs
The Company Blurbs section allows Clients to add/edit/remove custom text to be displayed on the following Employee Portal pages:
1. Login Page Header
2. Login Page Footer
3. Landing Page
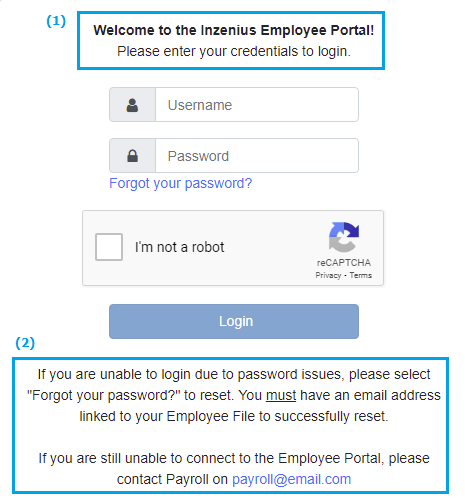
Figure #5: Company Blurbs – Login Page Header & Footer
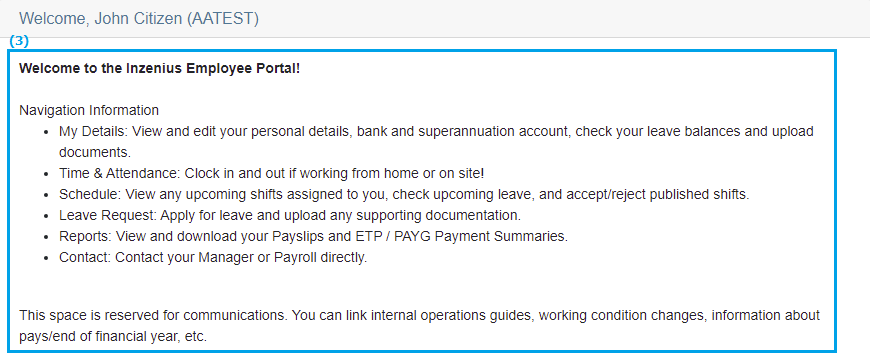
Figure #6: Company Blurbs – Landing Page
Each section’s text box provides various controls for editing text, adding links to Web Pages/Email Addresses and/or external files:
![]() Undo/redo changes
Undo/redo changes
![]() Bold highlighted text
Bold highlighted text
![]() Italicize highlighted text
Italicize highlighted text
![]() Underline highlighted text
Underline highlighted text
![]() Strikethrough highlighted text
Strikethrough highlighted text
![]() Indent highlighted text
Indent highlighted text
![]() Outdent highlighted text
Outdent highlighted text
![]() Insert dot-pointed lists
Insert dot-pointed lists
![]() Inserts numbered lists
Inserts numbered lists
![]() Set the style of the highlighted text
Set the style of the highlighted text
![]() Set the font of highlighted text
Set the font of highlighted text
![]() Set the size of the font, able to use values between 1 and 7.
Set the size of the font, able to use values between 1 and 7.
![]() Set the colour of the highlighted text
Set the colour of the highlighted text
![]() Create a hyperlink using the highlighted text
Create a hyperlink using the highlighted text
![]() Remove hyperlink from highlighted text
Remove hyperlink from highlighted text
![]() Insert line-break
Insert line-break
![]() View and edit code generated by the editor. Must be used to insert images, images are to be hosted externally.
View and edit code generated by the editor. Must be used to insert images, images are to be hosted externally.
- Copy and paste the following snippet in where the image is be located:
<img src=”{image_URL}” /> - Replace {image_URL} with the URL to your external image
Table #2: Company Blurbs Controls
If needed, the height/size of the text box can be adjusted to make editing large amounts of text easier! Simply click and drag the bottom right-hand corner of the text box to the desired size.

Figure #7: Company Blurbs – Resizing blurb text box
Users are also able to preview any changes made prior to saving to ensure correct formatting/output in each section.
To preview your changes, simply select the corresponding “Preview” button located beneath each text box.
![]()
![]()
Figure #8: Preview Pages
To save your change, click on “Save Blurbs” button to save the changes made.
![]()
Figure #9: Save Blurbs
Configure Managers
Here is where you will be able to configure the Managers that will be available within the “Contact” and/or “Leave Request” page drop-down menus, and associate them with their specific Site(s)/Location(s) and Cost Centre(s).
To add a new Manager, select the “+ Add” Button and enter the Manager Details accordingly.
You are also able to enter additional email addresses that will be included in any emails directed to a particular Manager; here, you are able to determine if the additional email is to be Cc’d or Bcc’d into the email accordingly.
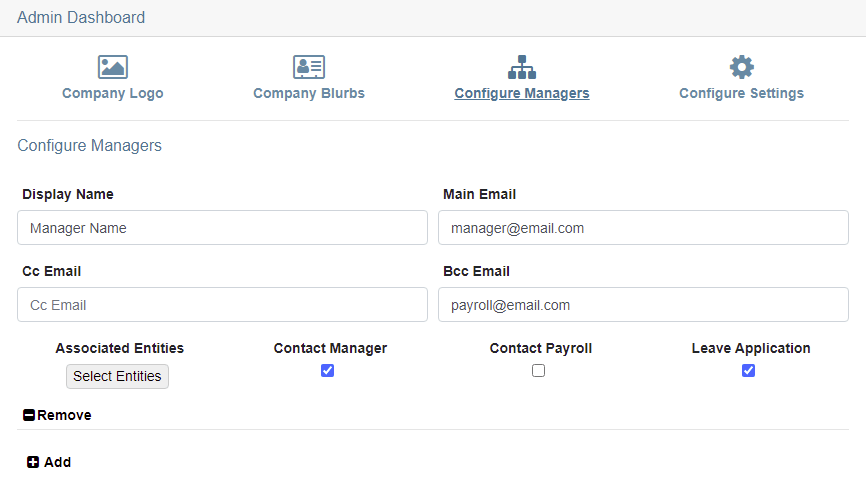
Figure #10: Manager Setup
As noted above, Managers will need to be associated with the Location(s) and Cost Centre(s) that they preside over. This will ensure that a Manager will only be made available for selection by employees who have been assigned to the selected Location(s) and Cost Centre(s).
To associate specific Entities to new/existing Managers, select the “Select Entities” button, and in the “Locations/Cost Centre” selection pop-up window, flag the required Location(s) and Cost Centre(s). Once complete, select the “Save” button to close the “Locations/Cost Centre” selection pop-up window.

Figure #11: Configure Managers – Location & Cost Centre Assignment
Once you have associated the appropriate Entities, you are now able to select roles to be enabled for the Manager by flagging the necessary check-boxes:
• Contact Manager: Will allow employees to select the Manager from the “Contact” page when the “Manager” radio button is selected;
• Contact Payroll: Will allow employees to select the Manager from the “Contact” page when the “Payroll” radio button is selected;
• Leave Application: Will allow employees to select the Manager from the “Leave Request” page.
Note: You are able to select more than one option if required.
![]()
Figure #12: Configure Managers – Contact types
Once changes have been made a “Save” button will appear at the bottom of the Manager’s section, this will save your changes for the Manager you have selected/created.
![]()
Figure #13: Configure Managers – Save single manager
If changes to multiple Managers have been made a “Save Changes” button will appear at the bottom of the page, this will save all changes made to the updated Managers accordingly.
![]()
Figure #14: Configure Managers – Save all changes
If a Manager is required to be removed, this can be actioned at any time. To remove a Manager, select the “Remove” button displayed directly beneath the Manager to be removed.
![]()
Figure #15: Configure Managers – Remove manager
Note: Once a Manager is removed from the Employee Portal, this cannot be undone. The Manager will need to be re-configured if they were removed inadvertently.
Configure Settings
The Configure Settings page allows you to make basic changes to the Employee Portal. Each section that are impacted by the settings on this page are detailed below.
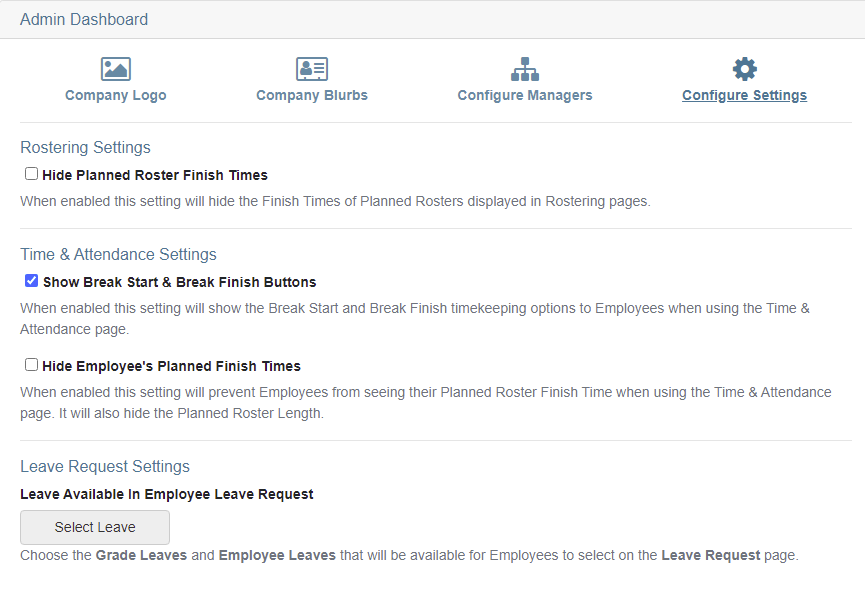
Figure #16: Configure Managers – Configure Settings
Roster Settings
Where “Hide Planned Roster Finish Times” is flagged, the Finish Times of Planned Rosters displayed in the Rostering pages. Where this option is unflagged, Roster Finish Times will be displayed.
Time & Attendance Settings
Under the ‘Time & Attendance Settings’, there are two toggle options which impact the Time & Attendance page of the Employee Portal:
- Show Break Start & Break Finish Buttons: When enabled, this setting will show the Break Start and Break Finish Timekeeping options within the Time & Attendance page.
- Hide Employee’s Planned Finish Times: When enabled, this setting will hide the Planned Roster Finish Time, and Planned Roster Length within the Time & Attendance page.
Leave Request Settings
Under the ‘Leave Request Settings’ is where specific Grade Leave(s) will be selected to be displayed in the Employee Portal “Leave Request” page.
To select the Grade Leaves to be displayed in the “Leave Request” page, simply:
- Select the “Select Leave” button
This will open a pop-up dialogue box which will contain all of the Leave Types configured in the Inzenius Database - Expand the necessary Leave Name to view the Grade Types that the Leave is assigned to
- Flag the Grades which will be permitted to submit Leave Requests via the Employee Portal
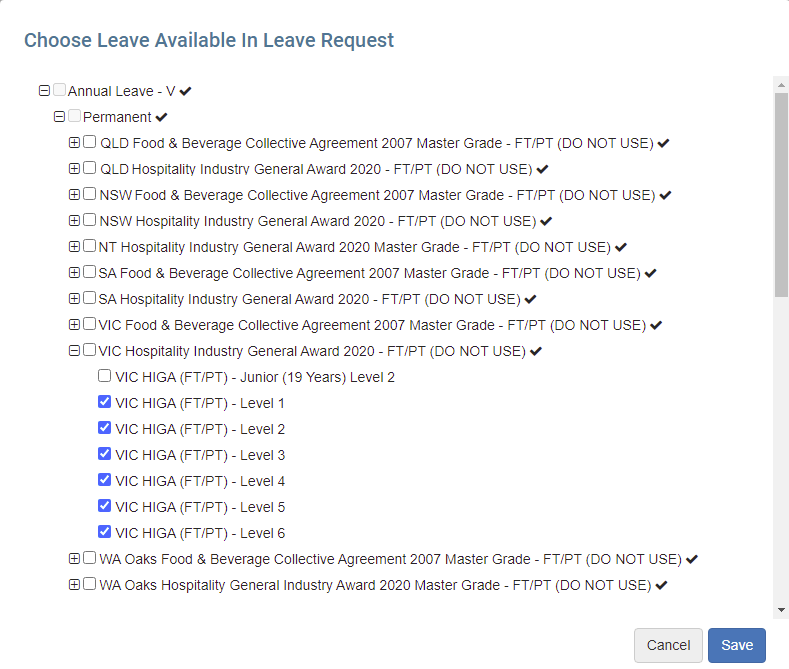
Figure #17: Configure Settings – Choose Leave Available in Leave Request
Note: If all Grades listed beneath a Leave are to be selected, you are able to select the cascade button (“√”) next to the Leave Name.
Onboarding Requests
The Onboarding Request is where the Clients are able to Accept or Reject Onboarding Requests from potential Employees/Users. The potential Employee/User will not be able to begin the Onboarding process until the Onboarding Request is Accepted by the Client.
The Onboarding Requests page will only be available to Administrator and some select Users
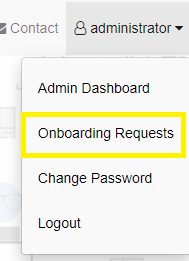
Figure #18: User Settings – Onboarding Requests
Note: Access to the Admin Dashboard is determined by the security access configured in User’s Role in the Inzenius Core Application‘s ‘Security’ module.
New and pending Requests will be shown in the Pending Requests section. Once a Request is Approved or Rejected, it will then move to the Archived Requests. When a User Approves a Request, a link will be sent out to the Employees email address to begin the Onboarding Process.
The link will only be valid for 24 Hours, however, it can be resent from the Archived Requests section.

Figure #19: Onboarding Requests – Accept or Reject Requests